
The page about making cam toys is attracting a lot of interest which makes me think you are really keen on making toys yourself. Sounds like this should be the main direction of our site for some time.
This here is an introductory guide. We'll be looking further to find or design some specific tin toy instructables. This is a great craft and I don't want to let it die. And I'm sure you don't want that too.
The primary source for making tin toys are
used tin cans
and they are obviously a very affordable material, especially if you like to drink coke or beer in cans. But of course all kind of cans can be used: corn, tomato, olives, coffee, tea, spice cans and so on. The tin used in them is just the kind of tin you want for your toys: it's durable enough but at the same time is not too thick and isn't hard to work with.
Making tin toys from cans is fun for everyone, even for adults. Teachers often play with them together with 10 - 12 years old kids which is probably the best age when kids can start making them.
Cutting the cans
In most cases you will only use the softer thin that is on the can sides so you will need to cut the top and bottom parts. The easiest way to do it is to follow the joints if there are any. Otherwise just fix a position at
0.5" near the lid
and the bottom of the can so you get the most of the usable tin.
You can use an awl or a knife to make the first slot and then continue with strong scissors. If you use a knife for all the cutting it's going to blunt very soon. Hold the can with your left hand and cut with the right one, making sure the bigger part of the can remains at left. Cutting cans is not a rocket science but you need to be careful with the sharp parts.
Tools to make the parts
After you have the tin pieces you will need to cut, bend and prepare the parts of the toy. For these actions you may need an awl, pliers, a press, pounders, cord and soldering iron. Don't let the large list of tools scary you - you can make tin toys with just good scissors and pliers but having the right tools helps a lot.
Soldering and joining the parts
Parts that will not move usually need to be soldered. This is one of the specifics of making tin toys which needs a bit more attention especially when kids make them.
durability of the tin toy
depends mostly on proper soldering. The toys usually break in the places of joints, not elsewhere.
Don't forget that some parts can be joined with bolts and nuts rather than spoling. T-joints, corner joints and edge joints sometimes can be used as alternative.
Painting the toys
Prior to painting tin toys need a bit of preparation. Remove the sharp corners and soldering edges with a file. Lightly polish the toy with soft brush, clean it and remove the dust.
Painting the toy depends on the paint you want to use: usually acrylic paints work best. Let it dry well before using.
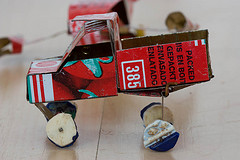
The photographer has bought this one from Mali, and yes it's made of cans.
Photo by Erwin Bolwidt
Adding Gears
You can use cans even to build some simple gears, but if you want good rack-wheels you'll probably need to buy them or make them separately from other material. Other than that installing gears in a tin toy is not much different than installing them in other mechanical toy - you need to use some attaching mechanism and do some soldering to join it with the moving parts.
Resources
Apparently very few resources about making tin toys are available online. This makes me think we should make some tin toys and document the process so people have decent contemporary guides to look at.
Here are few sources I have used or learned from:
- Making Tin Can Toys - A 1919 book by Edward Thatcher
- How to make a tin soldier - one of the few decent guides by Ehow. Not exactly the same kind of toy I mean however
- Repairing old tin toys - not much info here but few nice pics
- Tin can crafts: toys - one short guide for making toys
If you have made a tin toy yourself, make sure to share it with us.
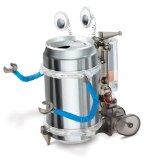
I'm a tin can robot, baby!